null
Close

Site Information

Tech Support

We understand that installing braking systems or converting your existing braking system is not always easy. Even some of the most experienced mechanics can get overwhelmed when it comes to power booster brakes or disc brake conversions — and your brakes are definitely a part of your car that you need to be functioning perfectly. 

That is why we provide FREE tech support with your order! Leave us a message using the chat system and create a ticket. We will be happy to help you figure out what is going on with your braking system. We usually return tech messages at the end of the day and help every customer within 3 business days. If you can't wait for our support team, check out the resources below and see if you can diagnose the problem yourself or be able to give the tech more information about your setup. You may also download our exclusive tech guide that may answer any questions you have.


If  you need an instruction manual please scan the QR code on your invoice.


flowchart.jpg


We get a lot of questions before and after a sale on our kits. Below you will find most questions have been asked and answered below.

Top Frequently Asked Questions

Q: My brake pedal depresses about 1" before I feel any pressure.

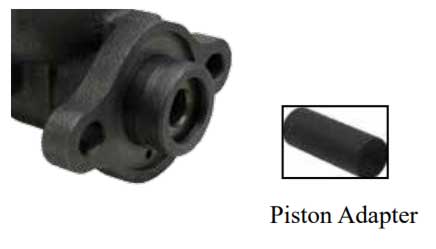
A: Either you do not have the bullet adapter that is included in the master cylinder box inserted in the back of 

pistonadapter.jpg

the master or your pin is not adjusted correctly. If running disc in front and disc in rear check the caliper to make sure they are adjusted properly.

See this video on adjusting your caliper and how to bleed the calipers correctly.


Q: I can't lock my brakes up or it doesn't feel like enough pressure is building up.

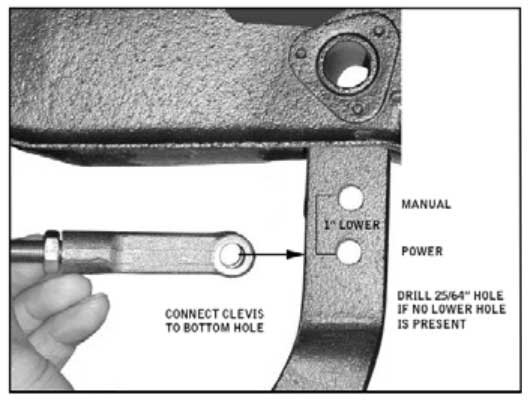
A:  You may be short stroking the master and not fully depressing the pedal enough to push the piston out far enough to fully engage the calipers. When converting from manual to power on GM vehicles you must lower the rod location on the pedal down 1" from the original drum pedal rod location. 

pedallocation.jpg

Not doing so does not give the right pedal ratio and you will never get the correct ratio to fully depress the piston. On some vehicles there is already an option for a power brake connection.

If there isn't a is pre drilled hole measure 1" lower from the original pedal location using a 5/8" drill bit. The connection to the power booster should never bind or come in at an angle that bends the pedal rod. 

For a general booster installation manual please see this link.

 Q: My rear calipers won't allow the pads to fit over the rotor.

nr172takeapart.jpg


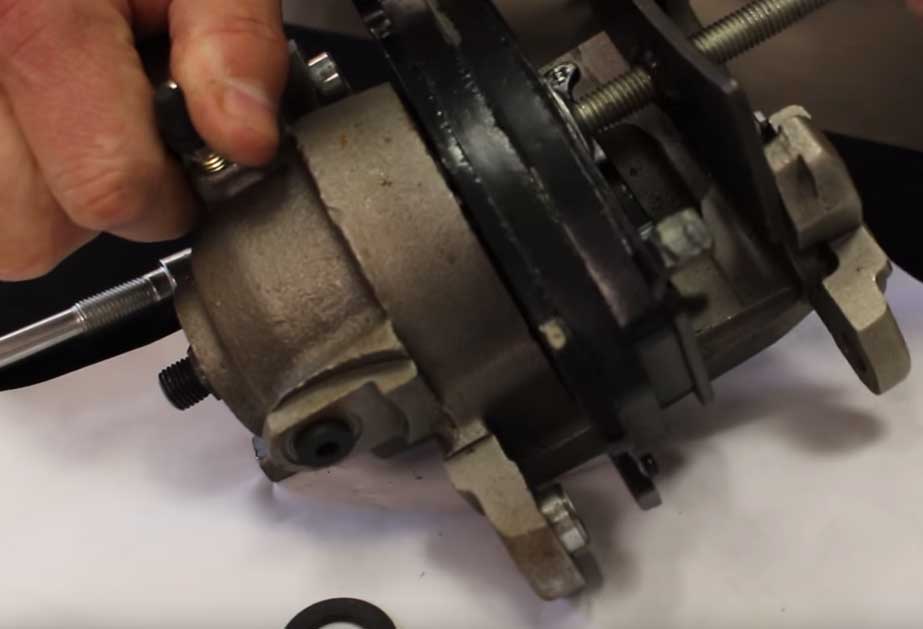
 A: Adjust the piston on the caliper by removing the spring and bolt that holds the mechanism together. Remove the bleeder plug as this may cause the piston not to retract far enough and create a vacuum. You should now be able to depress the piston in far enough to have enough space for the pads to fit on the rotor. See this video on adjusting your piston to allow the pads enough room to slide over the rotor.

Q: I am getting fluid to the front but not the back.

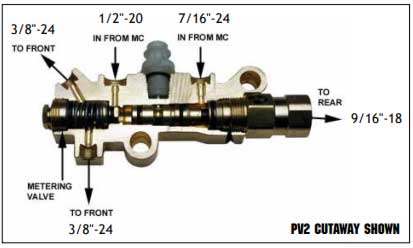
A: Most likely your valve has been tripped during the bleeding process. To reset the valve unscrew the white plastic brake light warning switch and remove it. 

cutaway.jpg

Look inside the the opening and locate the shuttle pin. If a notch is seen your valve is centered and working correctly. If this is the case inspect your rear flex hose that goes over the rear axle. If you reused your old flex hose it may not be fit to handle the pressure of disc brakes and should be changed. If the rear flex hose is old it may be collapsing and acting like a check valve. Fluid will come out but not come back in. If you see a solid shaft on the shuttle pin than the valve is tripped and can be reset by removing the rubber cap on the back of the valve and carefully unscrewing the metering spring. Once removed the shuttle pin should move freely and you can then recenter the pin by inserting a blunt object in the valve or a pick/scribe in the center of the pin to center it. Once centered you can proceed to put the valve back together and re bleed the system. Tripping the valve occurs when pressing on the pedal too hard while bleeding, using a power vac bleeding system with the PSI too high or not using the bleeder tool that came with your kit. If you need to purchase a bleeder tool please see this link. 


Q: My brakes are dragging, overly sensitive, or the pedal is engaged before I even use the pedal.

A: If using manual brakes ( no power booster ) make sure that your pin on the pedal is adjusted correctly. If using our universal rod kit you may need to trim off some of the push rod so that you are not pre-engaging the master. You can either use a Dremel or hack saw to cut the rod to length. If running power brakes you need to adjust the pin on the booster. You should only have about a penny's width between the booster pin and the back of the master cylinder. Most of our boosters have a lock pin and you can have a helper depress the booster to expose the full rod. Once exposed you can turn the nut counter clockwise to move the lock nut out of the way. Then screw the pin in the booster to the desired length. Re assemble and retest your brakes. You should never feel any resistance when placing the master on the power booster. 


Some of our most popular kits are designed for the Camaro, Firebird, Chevelle, & GTO. See these great videos on how to install them!


Download our complete
All Inclusive TECH GUIDE!

pjtg-page-01.jpg 

Other Helpful Resources

1. Brake Booster Test

2
Brake Pedal Diagnostics

3. How To Diagnose Your Issue

4. Master Cylinder FAQ

5. Disc Brake FAQ

6. How Does A Brake Booster Work & Tech

7. What Master Cylinder Do I Need?


Typical Brake Setups

Figuring out how to plumb your brake system is quite simple. The two qualifying questions are:

1)  Is your brake system: Disc/Disc, Disc/Drum, or Drum/Drum?  Because...

  • Drum brakes require a 10 lb. residual pressure (RPV10) to counteract the spring tension in the drum system which tends to pull the shoes away from the drums.
  • Disc Brakes require a combination valve (often called a proportioning valve) and sometimes a 2 lb. residual valve- depending on where your master cylinder is relative to your calipers (see next bullet).

2)  For disc applications; Is your Master Cylinder mounted above or below your calipers? because...

  • If your master cylinder is below your calipers then a 2 lb. residual valve (RPV2) is needed to prevent fluid from flowing back from the calipers into the master cylinder.

Quick Reference Sheet:

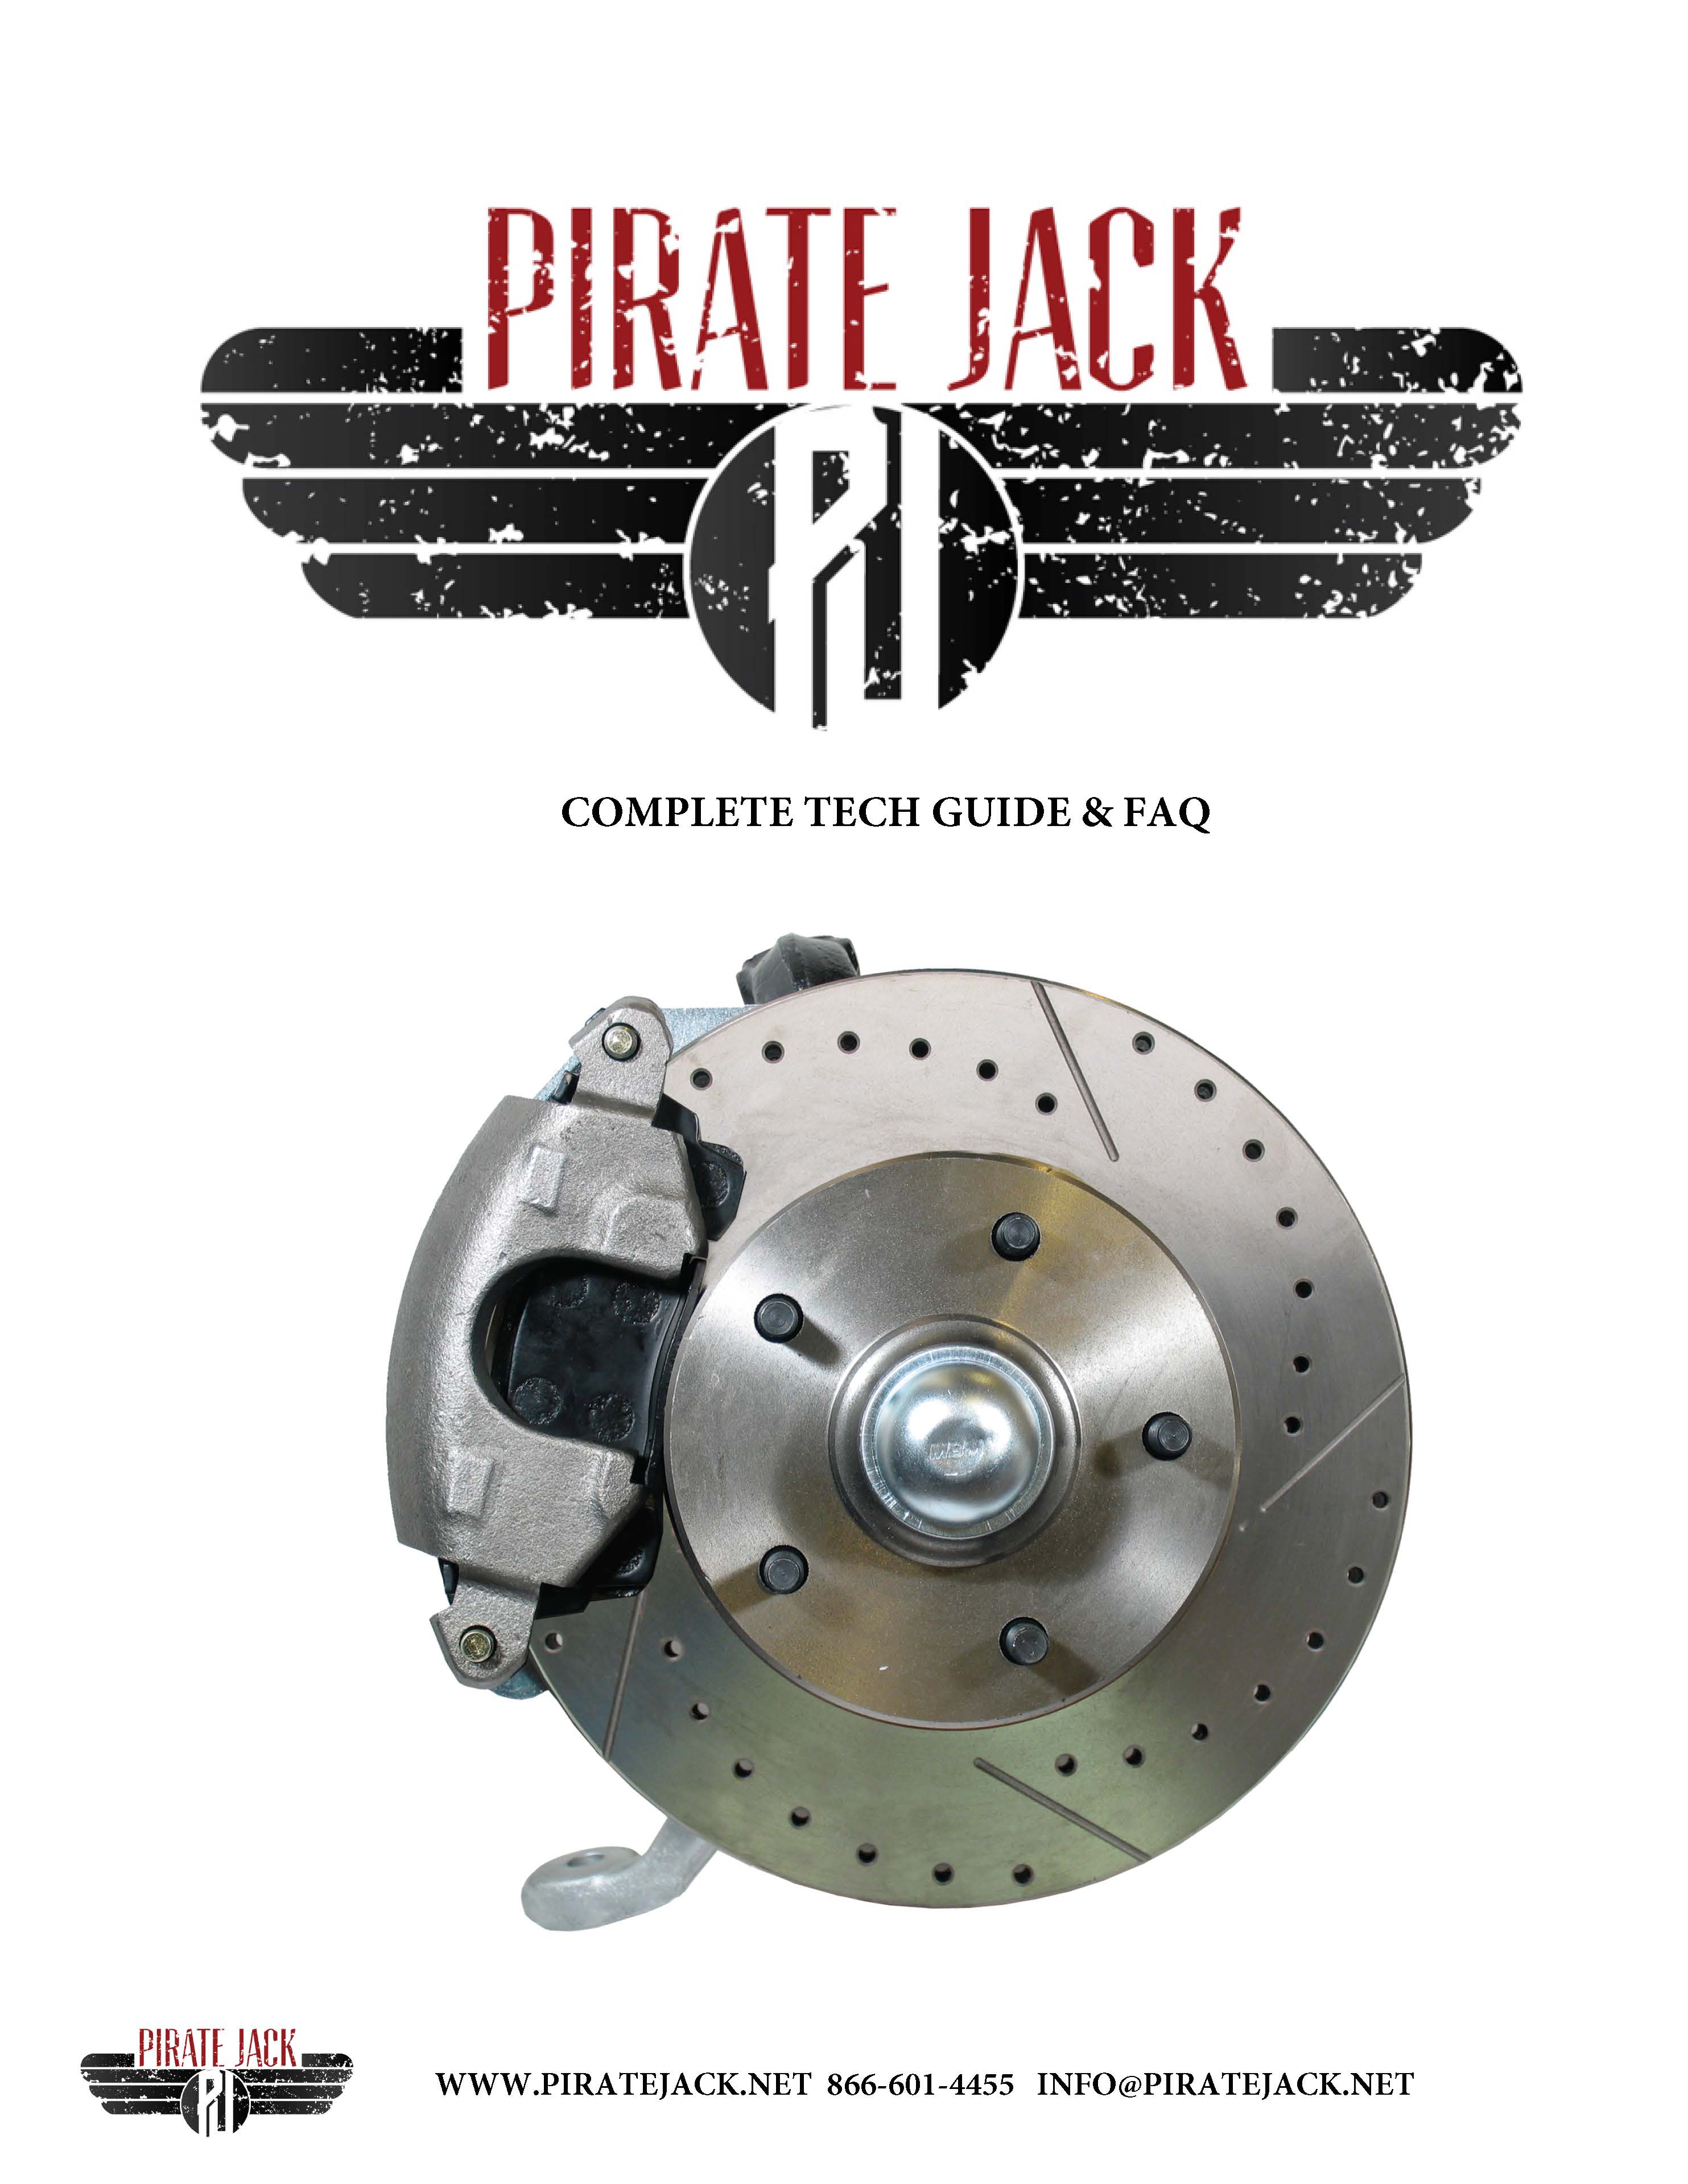
DISC BRAKES FRONT AND DRUMS REAR WITH MASTER ON FIREWALL
  • disc/drum, firewall

A disc/drum combination valve (PV2) is the easiest way to properly balance your braking system. The combination valve is two valves in one. It provides metering to the front which prevents nose dive and proportioning to the rear which prevents rear wheel lock up. We also recommend the addition of a 10 lb residual valve (RPV10) to the rear drum brakes.


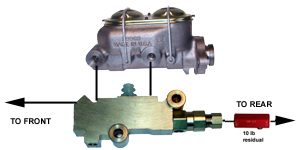
DISC BRAKES FRONT AND DRUMS REAR WITH MASTER UNDER FLOOR
  • disc/drum, under floor

The best way to plumb a disc/drum system when the master is under the floor is with a combination valve (PV2) and then a 2 pound residual valve (RPV2) to the front which is needed to prevent fluid from flowing back from the calipers into the master. We also recommend the addition of a 10 lb residual valve (RPV10) to the rear drum brakes.

{mosimage}


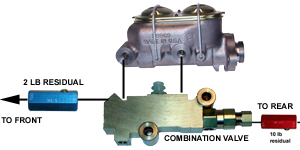
DISC BRAKES FRONT AND DISCS REAR WITH MASTER ON FIREWALL
  • disc/disc, fire wall

The best way to plumb a disc/disc system when the master is on the firewall is with a four wheel disc brake combination valve (PV4).


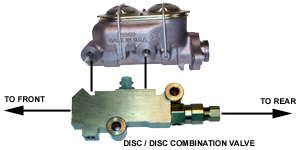
DISC BRAKES FRONT AND DISCS REAR WITH MASTER UNDER FLOOR
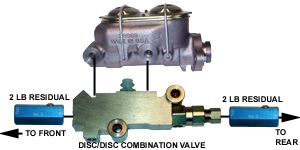
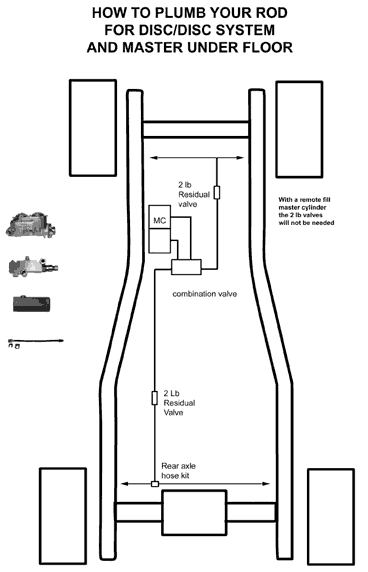
  • disc/disc, under floor

The best way to plumb a disc/disc system when the master is under the firewall is with a four wheel disc brake combination valve (PV4) and a two pound residual valve (RPV2) to the front and a two pound residual valve (RPV2) to the rear.